
Step into the enchanting world of avian hospitality and discover the joy of transforming a simple teacup into a charming bird feeder.
This delightful and rewarding craft not only adds a touch of beauty to your surroundings but also brings nature closer to home.
Picture yourself sipping your favorite tea while observing a symphony of feathered friends flitting about in your garden – a harmonious experience that seamlessly blends the serene with the lively.
Embark on this creative journey with our step-by-step guide on how to make a teacup bird feeder. Begin by drilling drainage and hanging holes in the teacup, ensuring the perfect balance of functionality and aesthetics.
Now, gather your materials, embrace your inner artisan, and embark on the satisfying endeavor of crafting a haven for the winged visitors in your backyard.
Watch as your teacup bird feeder becomes a focal point, inviting nature’s beauty into your everyday moments.
How To Make A Teacup Bird Feeder?
Crafting a teacup bird feeder is a delightful endeavor that blends creativity with functionality. Follow these steps to repurpose old teacups into charming havens for feathered friends.
Step 1: Gather Your Materials
Assemble all the materials in a well-lit and ventilated workspace. Ensure safety by wearing appropriate protective gear, especially when drilling.
Use the ceramic bit on the drill to carefully create small drainage holes in the bottom of the teacup. This ensures that water doesn’t accumulate, keeping the birdseed fresh and dry.
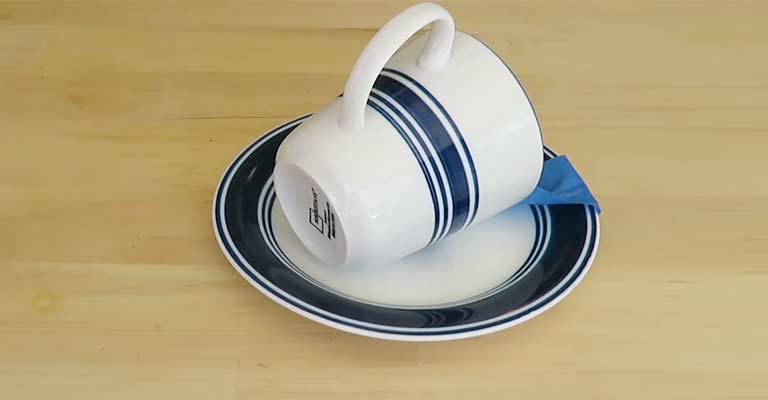
Step 2: Attach Saucer to Teacup
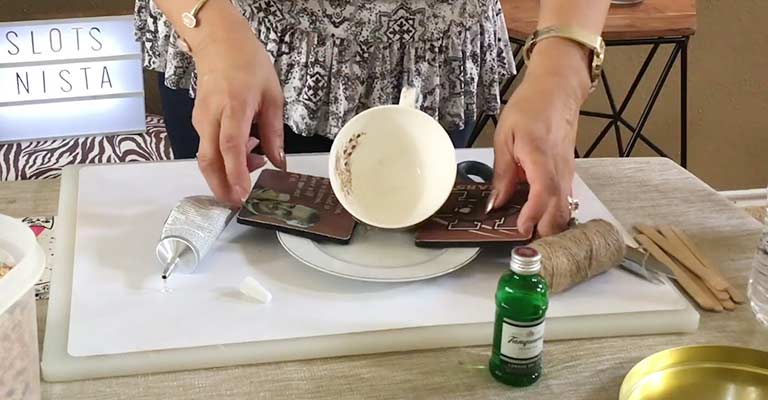
Apply a strong, waterproof adhesive to the rim of the teacup. Press the saucer onto the cup firmly, aligning them evenly. Wipe off any excess adhesive and let it dry completely. This creates a stable platform for the birdseed.
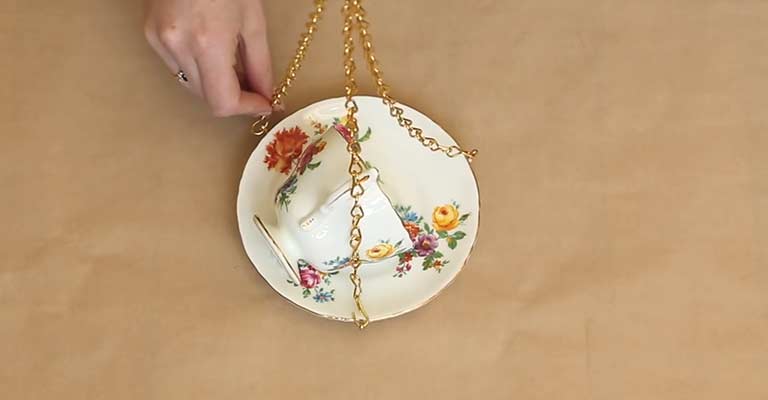
Step 3: Drill Hanging Holes
With the teacup upside down, drill two small holes opposite each other near the cup’s rim. These holes will be used to attach the chain or twine for hanging.
Step 4: Secure Eye Hooks
Screw small eye hooks into the holes you drilled. Use pliers to ensure they are tightly secured, providing a reliable anchor for the hanging mechanism.
Cut a suitable length of chain or twine, considering the desired height of your bird feeder. Thread it through the eye hooks and use pliers to secure it in place. Ensure it’s evenly balanced for stability.
Step 5: Add a Decorative Touch (Optional)
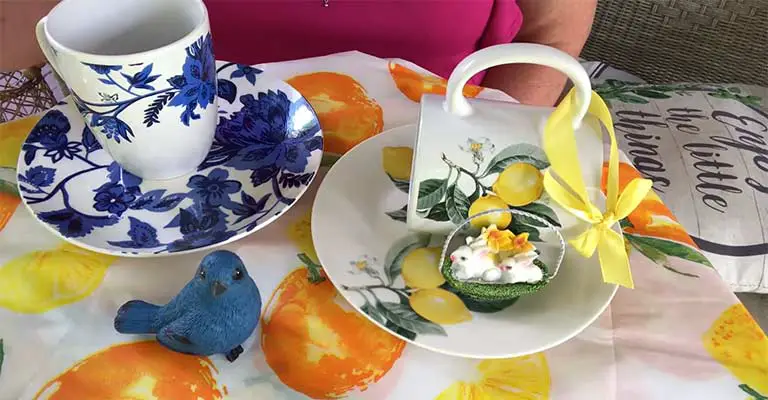
Feel free to add a personal touch by painting the teacup and saucer or decorating them with weather-resistant materials. This step allows you to express your creativity and make the bird feeder uniquely yours.
For added durability, especially if your bird feeder will be exposed to the elements, apply a waterproof sealant. This extra layer of protection helps preserve the integrity of the materials over time.
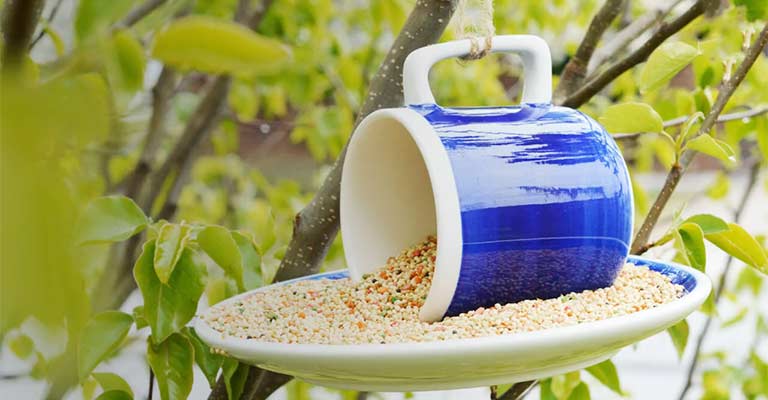
Step 6: Fill with birdseed
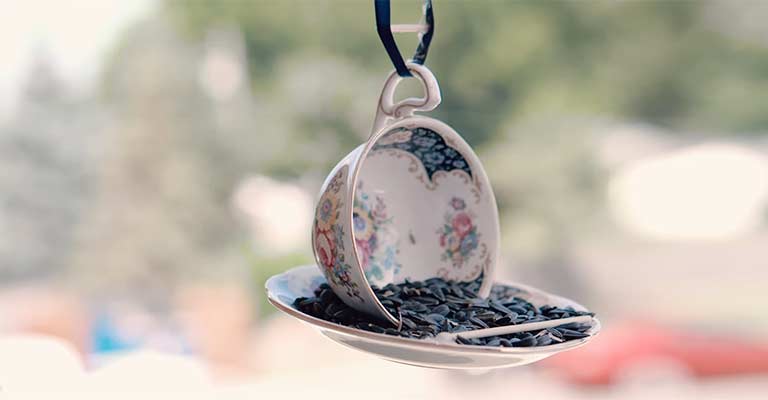
Once all components are dry and secure, fill the teacup with an appropriate birdseed mix. Different bird species prefer various seeds, so choose a blend that caters to the local avian population.
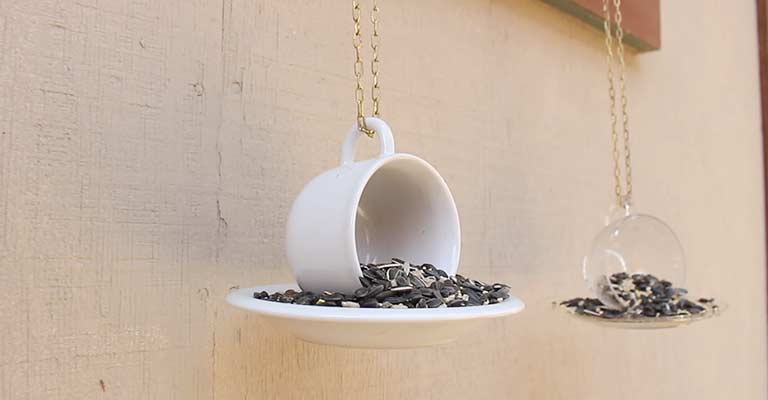
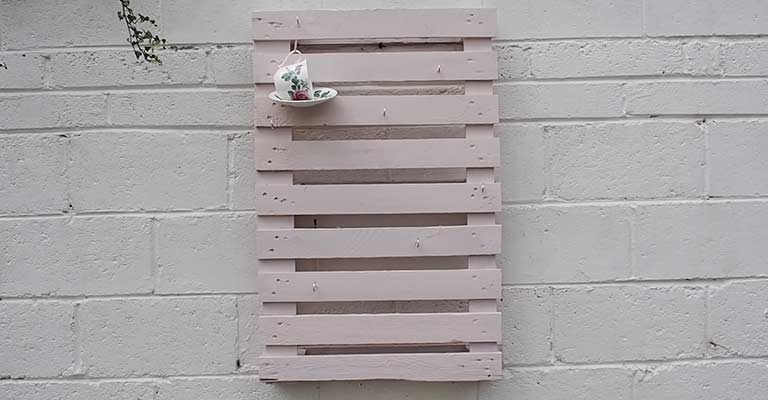
Step 7: Hang and Enjoy

Find a suitable location to hang your teacup bird feeder, ensuring it’s easily accessible for both you and the feathered visitors. Consider placing it near a window so you can enjoy the birdwatching experience from the comfort of your home.
Maintenance Tips
Regularly clean the teacup bird feeder to prevent mold and bacteria growth. Refill the feeder as needed, especially during colder months when birds may struggle to find food.
Inspect the hanging mechanism periodically to ensure it remains secure. Crafting a teacup bird feeder not only adds charm to your outdoor space but also provides a welcoming spot for birds to indulge in nature’s bounty.
Enjoy the serenity and connection to wildlife that your handmade feeder brings to your backyard.
What Is the Best Glue for Teacup Bird Feeders?
Choosing the right glue for your teacup bird feeder is crucial for ensuring a durable and long-lasting bond. Here’s a comprehensive guide to help you navigate through the options:
Epoxy Resin
Epoxy resin provides a strong and waterproof bond, making it suitable for outdoor applications. It’s resistant to temperature changes and can withstand exposure to the elements.
The application process can be a bit complex, involving mixing two components. Additionally, epoxy resin may be more expensive than other adhesive options.
Silicone Adhesive
Silicone adhesive forms a flexible and waterproof seal, making it ideal for bird feeders exposed to rain or other weather conditions. It’s also resistant to temperature changes.
While durable, the bond may not be as strong as some other adhesives. Ensure the silicone is specifically labeled as waterproof.
Outdoor Glue
Some glues are designed explicitly for outdoor use and can handle exposure to the elements. They are often weather-resistant and provide a strong bond.
Read labels carefully, as not all outdoor glues are created equal. Some may not be suitable for bonding ceramics or porcelain.
Super Glue (Cyanoacrylate)
Superglue is known for its quick bonding properties. It forms a strong bond and is relatively easy to use. Some formulations are water-resistant.
Standard super glues may not be suitable for outdoor use, so check the label for water-resistant or waterproof varieties.
Marine Epoxy
Marine epoxy is designed to withstand harsh conditions, making it suitable for outdoor projects. It provides a strong and waterproof bond. It can be more expensive than other options, and like epoxy resin, it may involve a mixing process.
Ceramic Epoxy
Specifically formulated for bonding ceramics, this type of epoxy ensures a strong and durable bond on teacups. It often provides resistance to water and temperature changes.
Similar to other epoxy options, it may require careful mixing, and it can be pricier than standard glues.
What Is the Best Material to Make a Bird Feeder?
Selecting the right material for a bird feeder is crucial, considering factors like durability, weather resistance, and bird safety. Here are some commonly used materials and their considerations:
Wood
Wood is a classic and natural choice. It provides good insulation for birds in both hot and cold weather. It’s also customizable and aesthetically pleasing.
Without proper treatment, wood can deteriorate over time due to weather exposure. Choose rot-resistant types like cedar or redwood. Regular maintenance is essential to prolong its lifespan.
Plastic
Plastic bird feeders are lightweight, affordable, and resistant to weather. They come in various designs and are easy to clean. Over time, exposure to sunlight can cause some plastics to become brittle. Ensure the plastic used is durable and UV-resistant for longevity.
Metal (Steel or Aluminum)
Metal feeders are durable and resistant to weather. Steel is sturdy, while aluminum is lightweight and resistant to rust. Metal can conduct heat, potentially making it uncomfortable for birds in hot weather. Ensure that edges are smooth to prevent injury to birds.
Ceramic or Porcelain
Ceramic or porcelain feeders can be aesthetically pleasing and provide a classic look. They are relatively durable and can withstand weather conditions.
Care must be taken during the design to avoid sharp edges that could harm birds. Ensure the material used is suitable for outdoor exposure.
Glass
Glass feeders are elegant and provide a clear view of the seed levels. They are resistant to weather and easy to clean. Glass can break, so it’s important to choose thick and durable glass. Also, consider the weight as hanging glass feeders may require a sturdy support.
Recycled Materials
Using recycled materials aligns with eco-friendly practices. Many types of recycled plastic or composite materials are available and can be durable. Check the specifications to ensure that the recycled material is suitable for outdoor use and won’t degrade quickly.
Metal Mesh
Metal mesh feeders allow birds to cling while feeding. They are durable and provide good ventilation, preventing seed spoilage. Depending on the mesh size, some smaller seeds may fall through. Choose a mesh with appropriately sized openings for your intended bird species.
Copper
Copper is durable, resistant to corrosion, and adds a touch of elegance. It can develop a natural patina over time. Copper can be more expensive. Also, ensure that any solder used in construction is non-toxic for birds.
Tips for Choosing and Maintaining
To keep your bird feeder clean, follow the steps given below:
Weather Resistance and Easy to Clean
Consider the climate in your area. Materials like plastic, metal, and certain treated woods are more resilient to various weather conditions.
Regular cleaning is crucial for bird health. Choose feeders with accessible parts and materials that can be easily cleaned without harboring bacteria.
Avoid Toxic Materials and Make It Squirrel Resistance
Ensure that all components, including paint, glue, and sealants, are non-toxic to birds. Toxic substances can be harmful to their health.
If squirrels are a concern, opt for materials like metal or incorporate squirrel-resistant features to protect the feeder and its contents.
Consider Bird Species
Different bird species have varying feeding habits. Choose feeder designs and materials that cater to the birds you want to attract.
The best material for a bird feeder depends on your preferences, the local climate, and the specific bird species you want to attract. Consider durability, ease of maintenance, and safety for both the birds and the feeder itself when making your selection.
FAQs
Can I use any type of teacup for making a bird feeder?
Yes, you can use various types of teacups. Whether they are vintage, mismatched, or plain, the key is to ensure they are made of ceramic or porcelain, making them suitable for drilling.
What type of bird seed is best for the teacup bird feeder?
Choose a bird seed mix that caters to the local bird species. A general mix with sunflower seeds, millet, and cracked corn often works well, but you can adjust based on the birds in your area.
How do I clean and maintain the teacup bird feeder?
Clean the feeder regularly with mild soap and water to prevent mold. Remove old seeds, and inspect for any signs of wear. Refill as needed, especially during colder months when food may be scarce.
Can I decorate the teacup bird feeder?
Absolutely! Feel free to add your personal touch. Use weather-resistant paint or decorations, but be mindful not to obstruct drainage holes or make the surface too difficult to clean.
Do I need to hang the teacup bird feeder near a specific location?
Place the feeder in a location easily visible from your home, preferably near a window for enjoyable birdwatching. Ensure it’s secure and easily accessible for refilling, maintaining, and observing the feathered visitors.
Conclusion
As you put the finishing touches on your teacup bird feeder, take a moment to appreciate the harmonious intersection of creativity and nature.
Your crafted feeder is not just an object; it’s a testament to your ability to repurpose, create, and contribute to the well-being of the feathered inhabitants around you.
As you hang your teacup bird feeder, anticipate the joyful melodies that will fill the air as grateful birds discover this inviting haven.
This simple yet elegant addition to your outdoor space transforms it into a sanctuary, fostering a connection between your world and the vibrant avian community.
So, sip your tea, relish the beauty you’ve brought to your surroundings, and revel in the joy of sharing your space with the delightful creatures that will surely flock to enjoy your thoughtful creation. Cheers to the tranquility you’ve cultivated in your backyard!