
Capturing the graceful motion of birds in flight can be challenging and rewarding. It requires a blend of technical know-how, patience, and a keen understanding of avian behavior.
More than just pointing and shooting, photography of this nature is an art form that demands time and dedication. I’ll admit, my first attempts at photographing birds mid-flight were less than spectacular.
It’s tough getting the timing right – not to mention adjusting for light conditions, distance, and movement speed. However, with practice (and many shots that didn’t quite cut), I gradually honed my skills.
Nowadays, there’s something incredibly satisfying about clicking the shutter at precisely the right moment to capture a bird in full flight. The sharp details of the resulting image against a blurred background are always worth the effort.
Perhaps you’re here because you share this passion or want to explore new avenues in your photography journey. Either way, I’m excited to delve into some techniques that could help you perfect your shots of these magnificent creatures on the wing.
Understanding the Behavior of Birds in Flight
Birds, those masters of the sky, have always fascinated me with their ability to defy gravity easily. It’s no wonder bird photography, especially birds in flight, has become my passion. Let’s dive into this captivating subject!
Understanding bird behavior is a crucial first step for any aspiring bird photographer. Why? Because it gives us insight into when and where we’re likely to capture our subjects at their most dynamic and expressive.
Birds in flight exhibit behaviors dictated by their instinctual needs – finding food, avoiding predators, or seeking mates. For example:
-
Like eagles and hawks, Raptors often soar on thermals for prey.
-
Hummingbirds flit from flower to flower, sipping nectar.
-
Swallows swoop over water bodies, scooping up insects mid-flight.
Awareness of these patterns can help you anticipate your subject’s next move, allowing you to set up your shot just right.
Now, let’s talk about something all photographers love: light! Timing is everything to catch that perfect glint off a wingtip or highlight the vibrant colors of a bird’s plumage.
Early morning and late afternoon sunlight is softer and warmer than midday light, making your photos pop!
Another factor worth considering is weather conditions. Some birds take advantage of wind currents during stormy weather, while others may stay grounded until conditions improve. This variability adds another layer of complexity but also offers unique opportunities for dramatic shots.
Lastly, remember patience is key! Bird photography requires time as much as it does skill and knowledge; sometimes, hours pass before the perfect opportunity presents itself.
So there you have it – understanding these basic principles of avian behavior can greatly enhance your chances of capturing those stunning shots of birds in flight!
Choosing the Right Camera and Lens for Bird Photography
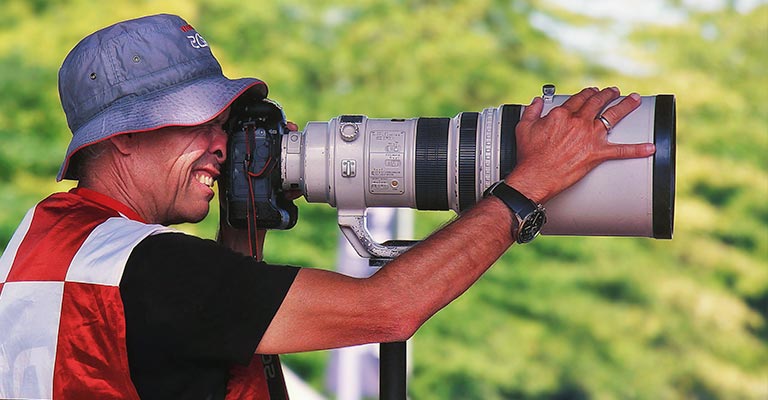
Let’s dive into one of the most exciting aspects of bird photography – finding the right gear. The world of cameras and lenses can be somewhat intimidating, but don’t worry, I’m here to help you navigate it.
Your camera is your main tool in this endeavor, so choosing wisely is crucial. DSLRs (Digital Single-Lens Reflex) and mirrorless cameras are considered top picks for bird photography due to their high performance in various lighting conditions and faster shutter speeds.
Notable examples include models like the Nikon D500, Canon EOS 7D Mark II, or Sony a9 II, which offer impressive speed and precision.
|
Model |
Type |
|---|---|
|
Nikon D500 |
DSLR |
|
Canon EOS 7D Mark II |
DSLR |
|
Sony a9 II |
Mirrorless |
Shooting birds in flight requires quick focus capability; hence, a good autofocus system is paramount.
This feature allows your camera to lock onto fast-moving subjects smoothly – necessary when our feathery friends decide it’s time to take off!
Now, let’s shift our attention towards lenses. Your lens choice will significantly impact the quality of your bird photos.
Telephoto lenses with long focal lengths (400 mm-600 mm) are recommended because they allow for close-ups even from a distance – just what you need when you’re trying not to disturb the wildlife around you.
Here are some popular options:
-
Sigma 150-600mm f/5-6.3 DG OS HSM
-
Canon EF 100-400mm f/4.5-5.6L IS II USM
-
Nikon AF-S NIKKOR 200-500mm f/5.6E ED VR
Remember that these recommendations aren’t definitive rules; they’re starting points for exploring bird photography gear! The best equipment will feel comfortable in your hands and meet your specific needs. Happy shooting!
Mastering the Technique of Tracking Birds in Flight
![]()
I’ve spent countless hours honing my skills, getting that perfect shot of a bird soaring through the sky. And let me tell you, it’s no walk in the park!
Capturing birds in flight requires patience, practice, and technical know-how. Here are some tips to help you master this exciting genre of wildlife photography.
First off, understanding bird behavior is crucial. You’ll find it much easier to track their movements if you can anticipate where they’re likely to go.
Spend time observing different species – note how they fly, hunt, and interact with each other. For instance, certain birds, such as gulls or kestrels, often hover before diving for prey – waiting for these moments can result in some incredible action shots!
Next up: equipment. Using a camera with fast autofocus and continuous shooting mode is essential.
A lens with at least a 200mm focal length will also give you sufficient reach without being too close and disturbing the birds.
|
Key Camera Settings |
Ideal Range |
|---|---|
|
Aperture (f-stop) |
f/5.6 – f/8 |
|
Shutter Speed |
1/1000s – 1/2000s |
|
ISO Speed |
As low as possible |
Now, let’s talk about technique. One method I often use is panning – following the bird with your camera as it moves across your field of view.
Start tracking before pressing the shutter button, and then maintain smooth movement while capturing multiple frames per second.
-
Don’t forget that practice makes perfect.
-
Experiment with different settings until you find what works best.
-
Remember that lighting conditions can significantly impact your results.
Lastly, don’t forget post-processing! Even great photos can benefit from minor tweaks like adjusting exposure or cropping for better composition.
Photographing birds in flight certainly poses a challenge. Still, with persistence and the right approach, you can capture breathtaking images that truly convey the beauty and grace of these winged wonders. So grab your gear, head out there, and start practicing!
Essential Camera Settings for Capturing Birds in Motion
Capturing birds in flight can be challenging, even for seasoned photographers. Having the right camera settings dialed in is critical to ensure you’re ready when that perfect shot presents itself.
Firstly, let’s talk about shutter speed. Your shutter speed needs to be fast, really fast, to freeze motion and get sharp images of birds against the sky. I’d recommend starting at 1/1000th of a second and adjusting based on your results.
Next up is the aperture. A wide aperture (low f-number) allows more light into your lens, which can help increase your shutter speed.
However, it also narrows the depth of field, making focusing more difficult. So, it’s a bit of a balancing act between these two settings.
ISO is another essential setting when photographing birds in motion. The higher the ISO, the more sensitive your camera is to light, which means you can use faster shutter speeds or smaller apertures in low-light situations.
But remember: Higher ISOs can lead to noisier images, so don’t crank it up too high unless necessary.
Consider using continuous autofocus (AF-C or AI Servo, depending on your camera model). This setting allows your camera to constantly refocus as long as you hold the shutter button halfway, which is ideal for tracking moving subjects like birds!
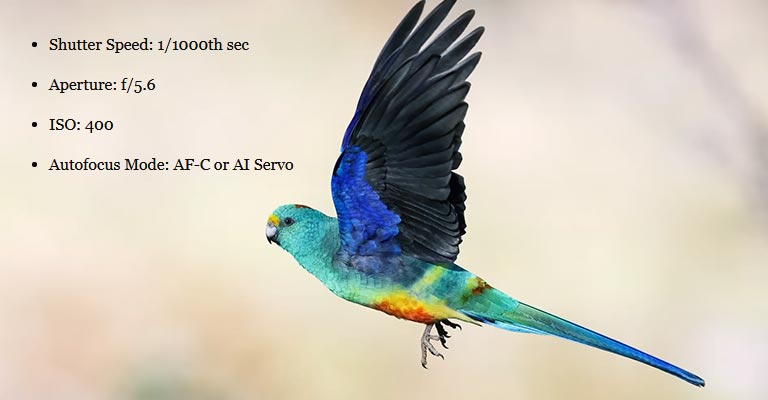
Here are some suggested starting settings:
-
Shutter Speed: 1/1000th sec
-
Aperture: f/5.6
-
ISO: 400
-
Autofocus Mode: AF-C or AI Servo
Remember, though, these are just starting points and may need tweaking depending on lighting conditions and how fast your subjects move! Photography isn’t an exact science it’s about experimenting and finding what works best for you.
Tips for Composition and Framing in Bird Photography

I’ve spent countless hours with my camera honing the art of bird photography. Over time, I’ve discovered key tips that can significantly improve your shots. Let’s dive into them.
First, always keep an eye on the background of your shot. It’s easy to get so focused on the bird we’re photographing that we forget about what’s going on behind it.
A cluttered or distracting background can take away from the beauty of the bird you’re trying to capture. Aim for a neutral or natural backdrop if possible.
Now, let’s talk framing. Positioning is everything when capturing great photos of birds in flight. You need to anticipate their movement patterns – easier said than done, right?
Start by observing and understanding their behavior before even lifting your camera.
-
Birds often fly into the wind: So position yourself accordingly.
-
Flocking birds usually follow a leader: Concentrate on that bird as others likely follow its route.
-
Some species have predictable flight paths: Researching beforehand will pay off!
Another aspect you should consider while composing your shot is including context elements without overshadowing the main subject – our feathered friend here!
This could be other birds in the flock, trees they perch upon, or elements like mountains or water bodies in distant backgrounds.
Lastly, don’t hesitate to experiment with different angles and perspectives; creativity adds that extra punch to any photo!
Try getting low for a ground-level shot or find higher ground for an aerial view – who knows what stunning compositions you might stumble upon?
Remember, though: Rules are there as guidelines, not strict boundaries! Feel free to break them whenever you feel it’ll add more value and interest to your image. Happy shooting!
Overcoming Challenges and Difficulties in Bird Photography
I’ve found capturing birds in flight to be one of the most challenging aspects of nature photography.
It’s a test of patience and skill, but I’ve discovered some tricks to overcome these challenges with practice and knowledge.
First on the agenda is dealing with unpredictable bird behavior. You can’t tell a bird to strike a pose or fly in a particular direction.
However, understanding their habits can give you an edge. For instance, many species have predictable flight paths when returning to their nests or during migration seasons. Staking out popular feeding areas or watering holes can also yield great results.
Next up is addressing focus issues – one of the biggest frustrations for beginners. Birds are fast-moving subjects that often disappear before your autofocus system has time to lock on them.
Manual focusing could resolve this problem but requires extensive practice and quick reflexes.
-
Tip: Pre-focus your lens on an area where you expect the bird to be – like a branch or feeder – then wait for the right moment.
Taking shots against bright skies presents another challenge: underexposure. To tackle this issue, it’s good practice to adjust exposure compensation settings on your camera until you get the perfect shot.
Lastly, let’s not forget about equipment limitations. The ideal gear for bird photography can be quite expensive; however, excellent results are achievable even with budget options if used correctly:
|
Equipment |
Ideal |
Budget-friendly |
|---|---|---|
|
Lens |
Telephoto (400mm & above) |
200-300mm range |
|
Camera Body |
Full-frame DSLR/Mirrorless |
Crop-sensor DSLR/Mirrorless |
Remember: mastering techniques such as panning shots or using burst mode is just as important as owning high-end gear.
So there we go! That’s my take on overcoming some common hurdles in bird photography. It ain’t always easy, but it’s always worth it!
Conclusion
Wrapping up, I’ve shared my insights and tips for photographing birds in flight. It’s not just about having the right gear or being in the right place at the right time. It comes down to patience, practice, and understanding bird behavior.
One thing’s for sure – you won’t nail it on your first try. You’ll have a few blurry shots and missed opportunities along the way.
But don’t let that discourage you! The more you practice, the better you anticipate a bird’s movements and capture that perfect shot.
To summarize:
-
Learn about bird behavior to anticipate their actions
-
Use fast shutter speed to freeze movement
-
Practice panning to track birds in flight
-
Be patient and persistent
Remember, no two flights are the same – each bird is unique with different flight patterns, making this field challenging yet rewarding.
As I sign off, keep this quote by Ansel Adams in mind: “You don’t take a photograph, you make it”. So go out there and create stunning images of birds soaring through the skies.
And most importantly, enjoy every moment spent observing these fascinating creatures from behind your lens!
I hope my advice will help you improve your photography skills when capturing birds mid-flight. Happy shooting!