
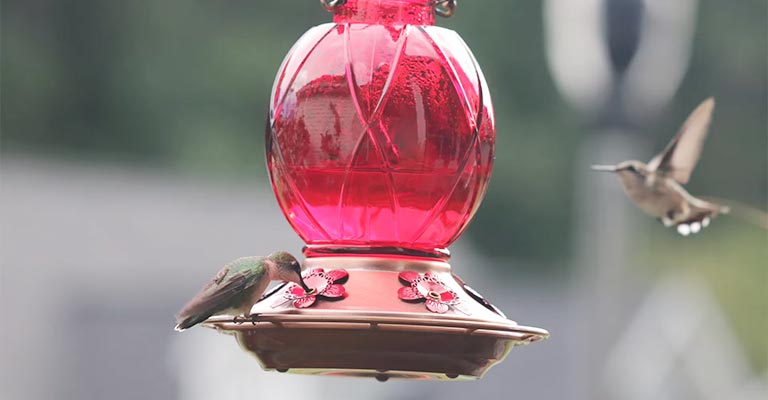
Hummingbird feeders are a delightful addition to any garden, attracting these tiny, vibrant birds with their sweet nectar. However, over time, these feeders can become a breeding ground for mold and bacteria.
To ensure the health and well-being of these beautiful birds, it’s essential to regularly clean and maintain your hummingbird feeder. So, how to clean mold from hummingbird feeders without any damage?
In this guide, we will walk you through the step-by-step process of safely and effectively cleaning mold from your hummingbird feeder. Mold not only compromises the quality of the nectar but can also be harmful to the hummingbirds.
By following these instructions, you’ll help maintain a clean and inviting environment for these magnificent creatures while ensuring they receive the nourishment they need.
So, let’s dive in and learn how to keep your hummingbird feeder mold-free and ready to welcome these charming visitors to your garden.
How To Clean Mold from Hummingbird Feeder?
To protect your hands from any potential mold or bacteria. A mixture of hot water and mild dish soap is your primary cleaning agent. A small, long-handled bottle brush is ideal for reaching inside the feeder’s nooks and crannies.
White distilled vinegar is an excellent natural disinfectant. If the mold is particularly stubborn, you may choose to use bleach as an alternative cleaning agent.
A bucket or basin to soak the feeder parts in the cleaning solution. Safety glasses to protect your eyes while working with cleaning agents.
Safety First
Put on gloves and, if using bleach or other strong cleaning agents, consider wearing safety glasses. Ensure the feeder is empty before starting the cleaning process.
Disassemble the Feeder
Carefully take apart your hummingbird feeder into its individual components. This may include the reservoir, the base, perches, and feeding ports.
Dispose of any old nectar in the feeder. If the nectar has turned cloudy or discolored, it’s time to clean the feeder.
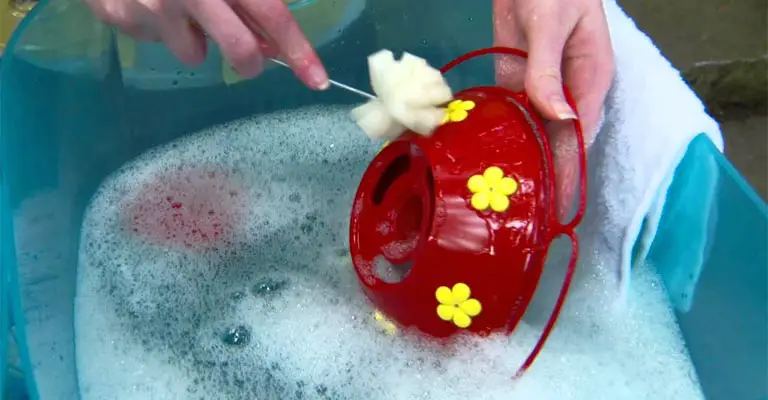
Soak in Soapy Water
Fill a bucket or basin with hot water and add a few drops of mild dish soap. Submerge all the feeder parts into this soapy solution. Let them soak for about 15-20 minutes. This will help soften and loosen the mold and debris.
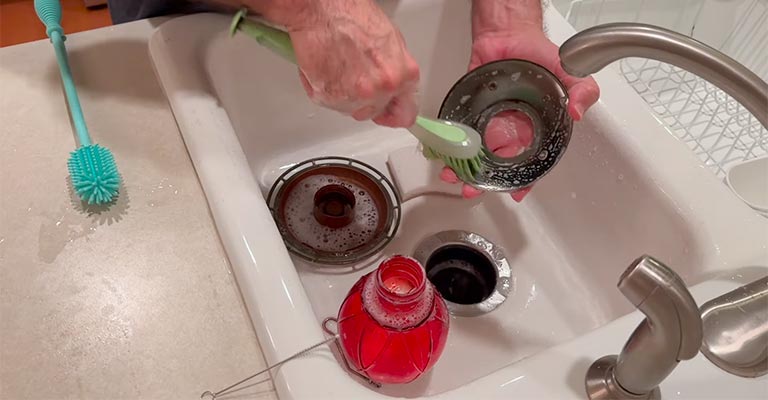
Scrub with Bottle Brush
After soaking, use a bottle brush to scrub the inside and outside of each part thoroughly. Pay close attention to the feeding ports and any intricate designs on the feeder. Ensure there is no mold or residue left.
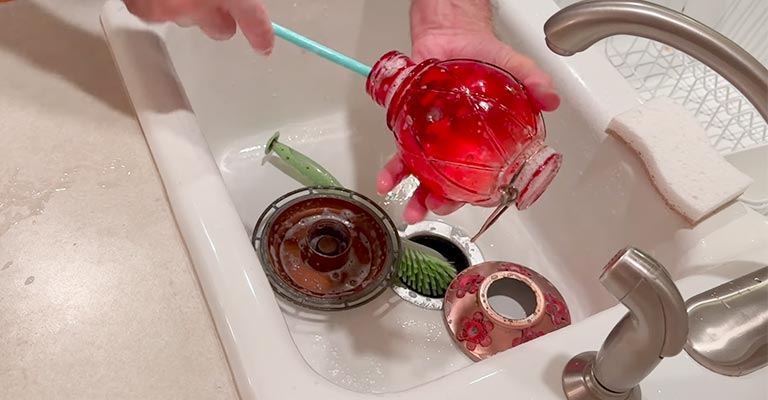
Rinse with Hot Water
Rinse all parts with hot water to remove the soap and any remaining mold or debris. Ensure that no soap residue remains as it can be harmful to the hummingbirds.
If you notice persistent mold or if you want to disinfect further, mix a solution of equal parts water and white distilled vinegar. Soak the feeder parts in this solution for 10-15 minutes, then rinse thoroughly with hot water.
Use Pipe Cleaners or Cotton Swabs
For those hard-to-reach areas, like the feeding ports, use pipe cleaners or cotton swabs to ensure all traces of mold and dirt are removed.
Place all cleaned parts on a clean towel or paper towel to air dry completely. Make sure there’s no moisture left, as this can encourage mold growth.
Reassemble the Feeder
Once everything is dry, reassemble the feeder, ensuring all components fit securely and snugly.
Mix a fresh batch of hummingbird nectar by combining four parts of water with one part of white granulated sugar. Never use honey or red food coloring. Fill the feeder with the fresh nectar.
Hang your clean and filled hummingbird feeder in a location that’s easily visible and accessible to the birds.
Cleaning Frequency
Regular maintenance is key to keeping your hummingbird feeder mold-free. Depending on the climate and the frequency of hummingbird visits, clean your feeder at least once a week, and more often in hot and humid weather conditions.
Cleaning mold from your hummingbird feeder is a simple yet crucial task in maintaining a welcoming environment for these remarkable birds.
By following this guide and practicing regular maintenance, you can help ensure that your garden remains a delightful haven for hummingbirds.
Bleaching your hummingbird feeder is an option in certain situations, but it should be approached with caution and used sparingly.
When to Consider Bleaching?
If you notice persistent or severe mold or bacteria growth inside your hummingbird feeder, despite regular cleaning with mild dish soap and vinegar, it may be time to consider using bleach. Mold and bacteria can be harmful to hummingbirds, so it’s essential to eradicate them.
Off-season Storage
If you store your hummingbird feeders during the off-season and they have become especially dirty or moldy, bleach can be useful to ensure they are thoroughly disinfected before reuse.
Preventative Disinfection
Some people use a mild bleach solution (explained below) as a periodic preventative measure to maintain feeder hygiene.
How to Use Bleach Safely?
When using bleach to clean your hummingbird feeder, it’s crucial to follow these safety guidelines:
Dilute the Bleach
Mix a mild bleach solution by adding 1/4 cup of bleach to one gallon of water. Never use undiluted bleach, as it can be harmful to both hummingbirds and the feeder materials.
Wear Protective Gear
Wear gloves to protect your hands and consider using safety glasses to shield your eyes from splashes.
After cleaning with the bleach solution, rinse all parts of the feeder thoroughly with hot water to ensure there is no bleach residue left.
Dry Completely
Allow the feeder parts to air dry completely before reassembling and refilling with fresh nectar.
Alternatives to Bleach
If you prefer not to use bleach, several alternative methods can effectively clean and disinfect your hummingbird feeder:
Vinegar
White distilled vinegar is an excellent natural disinfectant. Soak the feeder parts in a solution of equal parts water and vinegar for 10-15 minutes, then rinse thoroughly with hot water.
Hydrogen Peroxide
Hydrogen peroxide is another safe alternative. Mix equal parts water and hydrogen peroxide, soak the feeder parts for 10-15 minutes, and rinse well with hot water.
Mild Dish Soap
A solution of hot water and mild dish soap can effectively remove mold and dirt from your feeder. Soak the parts, scrub with a bottle brush, and rinse thoroughly with hot water.
Boiling Water
Boiling water can be used to disinfect feeder components. Pour boiling water into the feeder and allow it to sit for a few minutes before thoroughly rinsing and drying.
Key Tips for a Healthy Habitat
Avoid Using Too Much Bleach
Using too much bleach can leave a lingering odor or taste that may deter hummingbirds. Always dilute the bleach properly and rinse thoroughly.
Regular Cleaning
Regardless of the cleaning method you choose, it’s essential to clean your feeder regularly to prevent mold and bacteria growth. Clean it at least once a week, and more often in hot and humid conditions.
Choose Feeder Materials Carefully
When purchasing a hummingbird feeder, opt for one that is easy to disassemble and clean. Feeder design and material can impact how easy it is to maintain.
Monitor Nectar Quality
Keep an eye on the nectar in your feeder. If it becomes cloudy or discolored, change it immediately, as this can be a sign of mold or bacterial growth.
How Often Should I Clean My Hummingbird Feeder?
Regularly cleaning your hummingbird feeder is crucial for the well-being of these delightful birds and the maintenance of a healthy feeding environment.
How often you should clean your feeder depends on various factors, such as the weather, feeder design, and the level of activity from the hummingbirds.
In this guide, we’ll explore the key considerations and provide recommendations on how often to clean your hummingbird feeder.
Weather Conditions
The climate in your region significantly impacts how frequently you should clean your hummingbird feeder. In areas with hot and humid weather, mold and bacteria can thrive more quickly in the nectar, necessitating more frequent cleaning.
In contrast, in cooler and drier climates, the nectar might remain fresh for a more extended period.
In hot and humid conditions, it’s advisable to clean your hummingbird feeder at least once every 2-3 days. In cooler, drier climates, you can extend the cleaning interval to once a week.
Feeder Design
The design of your hummingbird feeder plays a role in how often you should clean it. Feeders with more intricate parts, nooks, and crannies can trap mold and debris more easily, requiring more frequent cleaning. Simpler, easy-to-disassemble feeders are generally easier to maintain.
Choose a feeder with a straightforward design and parts that can be easily taken apart and cleaned. Regardless of the design, it’s still essential to clean all components thoroughly.
Hummingbird Activity
The level of hummingbird activity in your garden also affects how quickly the nectar in your feeder is consumed. A more active group of hummingbirds will empty the feeder faster, reducing the chances of nectar going bad.
On the other hand, a feeder that remains partially filled for longer periods is more susceptible to mold growth.
Monitor the nectar level in your feeder. If it remains partially filled for several days, consider cleaning it and reducing the nectar quantity to avoid wastage.
Nectar Quality
Keep an eye on the quality of the nectar in your feeder. If the nectar becomes cloudy, discolored, or has visible debris, it’s a clear sign that it’s time for a thorough cleaning. Cloudy nectar is often a result of mold or bacteria growth.
Regardless of the time interval, if you notice a change in the nectar’s quality, clean the feeder immediately. Always aim to maintain clear, fresh nectar.
Seasonal Changes
Hummingbird behavior can change with the seasons. During peak migration or breeding seasons, you may see increased hummingbird activity, requiring more frequent nectar changes and cleaning. As the seasons shift, be mindful of these changes in activity.
Be adaptable with your cleaning schedule, paying attention to the hummingbird activity and nectar consumption patterns throughout the year.
Feeder Placement
The location of your feeder can also influence how quickly the nectar goes bad. Placing the feeder in direct sunlight can cause the nectar to spoil more rapidly due to increased heat and exposure to UV rays.
Position your feeder in a shaded area to prolong the freshness of the nectar and reduce the need for frequent cleaning.
Preventative Cleaning
As a proactive measure, some bird enthusiasts choose to clean their feeders at regular intervals, even if the nectar appears to be fine. This approach helps maintain a consistently clean and safe feeding environment for hummingbirds.
If you prefer this approach, consider cleaning your hummingbird feeder at least once a week during the peak hummingbird season and less frequently during slower periods.
Cleaning Process
Regardless of how often you decide to clean your hummingbird feeder, follow a thorough cleaning process, as outlined in a previous response. Regular maintenance is vital to ensure a safe and welcoming environment for these extraordinary birds.
By adapting your cleaning schedule to your specific circumstances and adhering to best practices, you’ll help ensure the health and happiness of the hummingbirds in your garden.
FAQs
Can I clean my hummingbird feeder with just water?
While water can help rinse away some debris, it’s not sufficient for thorough cleaning. Mold and bacteria can persist without the use of cleaning agents like mild dish soap, vinegar, or hydrogen peroxide.
What’s the best way to clean the small feeding ports on my hummingbird feeder?
Small, intricate feeding ports can be challenging to clean. To tackle these areas effectively, use pipe cleaners or cotton swabs soaked in your chosen cleaning solution.
Can I use red food coloring to attract hummingbirds to my feeder?
It’s best to avoid using red food coloring in your nectar. Hummingbirds are naturally attracted to the color of the feeder, and food coloring is unnecessary and potentially harmful to their health.
How do I prevent bees and wasps from swarming my hummingbird feeder?
To deter bees and wasps, choose a feeder with bee guards or ant moats. Bee guards are designed to keep these insects away from the nectar, and ant moats provide a barrier to prevent ants from reaching the feeder.
Is it okay to freeze extra nectar for later use?
Freezing extra nectar is a viable option if you’ve made more than your feeder can hold, or if you want to prepare nectar in advance.
Conclusion
Maintaining a mold-free hummingbird feeder is not only a matter of ensuring the feeder’s longevity but also a vital step in safeguarding the health of these enchanting birds.
By following the cleaning process outlined in this guide, you can enjoy the company of hummingbirds while promoting their well-being.
Remember to clean your feeder regularly, preferably every 3-4 days, especially during hot and humid weather. The simple act of cleaning and refilling the feeder will go a long way in keeping the nectar fresh and free from harmful contaminants.
With a clean and mold-free feeder, you can relish the sight of these little wonders darting around, knowing you’ve played a part in ensuring their health and happiness.
So, go ahead, follow the steps in this guide, and enjoy the delightful presence of hummingbirds in your outdoor space, all while making sure they have a safe and nourishing place to visit.